Mapping Rules
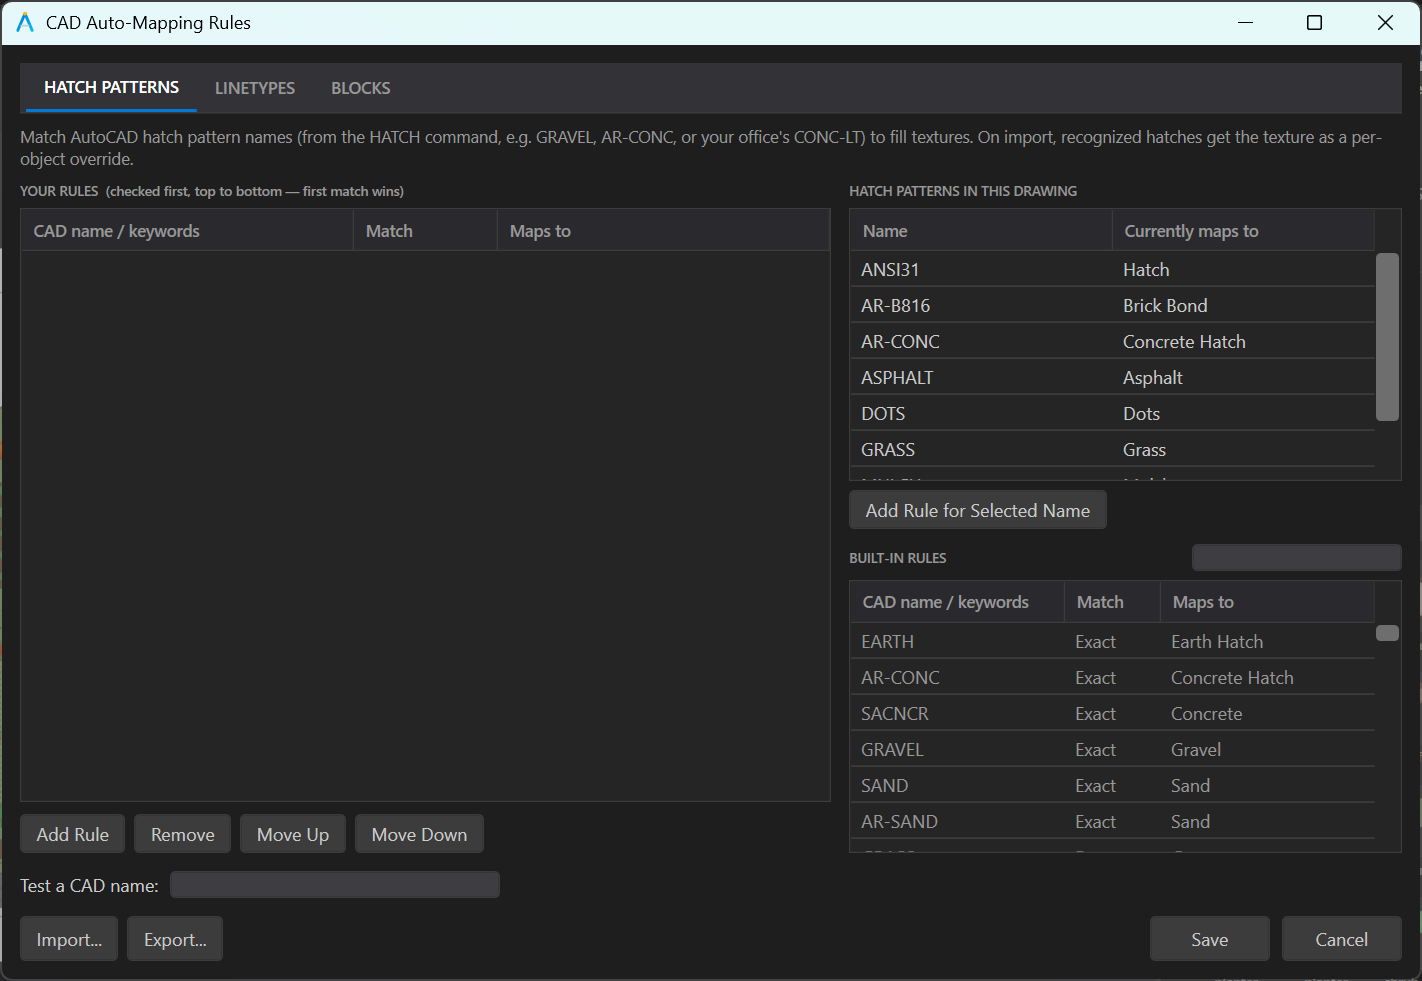
FILE ▸ CAD Mappings is where you teach Studio your office's naming. The built-in recognition covers the standard conventions; this dialog covers everything else, and it is the difference between auto-mapping working on a demo drawing and working on your drawings.
Four Kinds of Rule
The tabs across the top choose what you are teaching:
HATCH PATTERNS, LINETYPES, BLOCKS and
LAYERS. Each keeps its own list of rules. A layer rule matches the layer's
own name, so a layer inside an xref (SITE|C-BLDG) is matched by
C-BLDG.
Your Rules
The left column is your rule list, checked before the built-in tables, top to bottom, first match wins. Each rule has three parts:
| Column | What it holds |
|---|---|
| CAD name / keywords | What to match. Several alternatives can be listed, separated by commas, so one rule can cover a family of names. |
| Match | Exact matches the whole name; Keyword matches names that contain the term. |
| Maps to | The target: a fill texture or a material for a hatch rule, a stroke style for a linetype rule, a library symbol for a block rule, a material or Render as plain CAD for a layer rule. Each symbol is listed once and draws in whatever look the drawing uses. Choosing (Do not auto-map) is how you silence a built-in rule for a name you would rather handle yourself. |
Add Rule, Remove, Move Up and Move Down manage the list. Order matters: put your specific rules above your general ones.
In This Drawing
The middle column lists the CAD names actually present in the open drawing, with Currently maps to beside each. This is the quickest way to see what is not being recognized. Select a name and click Add Rule for Selected Name, or double-click it, and a rule is seeded with that name, ready for you to choose a target. The new rule goes in above any of your rules that already catch the name, so it takes effect; if you already have a rule for exactly that name, it is selected instead of adding a second.
Plant blocks can also be matched from FILE ▸ Plant Symbols, which shows each block beside the symbol it would draw as and saves your choices as rules here.
Built-In Rules
The built-in tables are shown, with a filter box, so you can see what is already handled before writing a rule that duplicates it. They are read-only; to change what a built-in name does, add your own rule for it, which is checked first.
Test a CAD Name
The probe at the bottom answers "what would this name do?" Type any name and it reports what it resolves to and which rule produced the answer. Use it when two rules seem to be competing, or to check a rule before committing to it.
Saving
Save writes the rules and immediately re-offers the
CAD Auto-Mapping prompt on the drawing you have open, so a
new rule can be tried without re-importing. Rules are stored per user in
%APPDATA%\AutoStylePro\CadMappingDB.
Sharing an Office Standard
Export... writes your rules to a file; Import... loads one. That file is the portable form of "this is how our office names things", and it is worth building once and distributing:
- Open a representative drawing, ideally one that uses your full layer and block standard.
- Work down the In This Drawing list, adding rules for everything that is not resolving.
- Test a few names in the probe.
- Save, then Export... to a shared location.
- Everyone else imports it once.
Writing rules that hold up
- Prefer Keyword for families. One keyword rule on
RIPRAPcoversRIPRAP-6IN,RIPRAP-CLASS-Band whatever comes next. - Prefer Exact when a name is ambiguous and a keyword would catch too much.
- Order specific above general. The first match wins, so a keyword rule near the top can shadow the precise rule below it.
- Use (Do not auto-map) rather than deleting things by hand every time a built-in match is wrong for your drawings.
- Check it against a second drawing before sharing it with the office.
A block rule can only point at a symbol that exists in the library. If the artwork you want is not there, import your own SVG through the + button on the Library panel first, then write the rule.