Fill & Stroke
The Fill and Stroke tab is where a drawing gets its appearance. It works on what is selected, a layer or one or more objects, and is divided into four sub-tabs: Fill, Stroke Paint, Stroke Style and Shadow.
Layers First, Objects Second
Style the layer wherever you can. Layer styling is what the Layer Style Database remembers, what survives a re-export cleanly, and what keeps a large drawing manageable.
Selecting a single object and changing a property creates an override on that object: it stops following the layer for that property and is marked in the scene tree. The header of the panel shows what you are editing and the object's handle, with an Override Layer Style checkbox to create or drop the override deliberately. An override that ends up identical to its layer is dropped automatically, so nudging a color back to where it started leaves no residue. To clear overrides in bulk, right-click the object and choose Clear Overrides, or the layer and Clear All Overrides.
Render as plain CAD, at the top of the panel for a layer, is a different switch: it opts that layer out of the document look rather than changing its style. Use it for title blocks, legends and any layer that must keep reading as drafting.
Fill
Applies to closed shapes, merged paths and circles. Open lines have no fill.
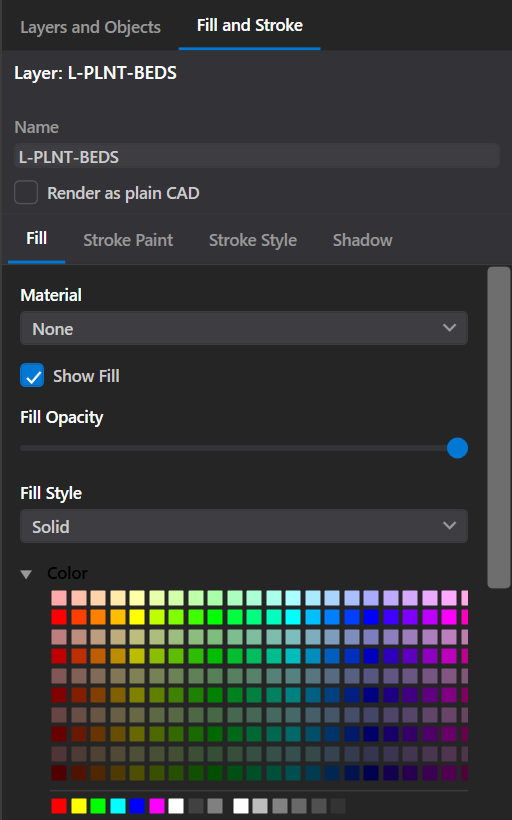
| Control | What it does |
|---|---|
| Material | What the surface is: Turf, Concrete, Water, Planting Bed and so on. See Materials. Assigning a material to a plain CAD shape gives it a sensible color to start from. |
| Show Fill | Turns the fill on or off. On an object the same checkbox reads Show Override Fill. |
| Fill Opacity | 0–100%. |
| Fill Style | Solid, Linear Gradient or Radial Gradient. See Textures & Gradients. |
| Color | R, G and B sliders, a hex box, and a ... button for the full color picker. The ACI swatch palette is there too, laid out as shade rows by hue columns. |
| Settings | Texture type, scale, rotation and opacity, plus a custom image option. See Textures & Gradients. |
Stroke Paint
Show Boundary turns the outline on or off (Show Override Stroke on an object), and the color controls work exactly like the fill's: RGB sliders, hex entry, swatches and the picker dialog.
Stroke Style
| Control | What it does |
|---|---|
| Thickness | Entered in inches or millimeters, with a unit list and − / + nudge buttons. Layer lineweights from CAD arrive here, so a 0.35 mm CAD layer starts as a 0.35 mm stroke. |
| Stroke Opacity | 0–100%. |
| Stroke Style | The linetype: basic dashes, site and civil linetypes, lettered utility lines. See Stroke Styles. |
Stacked stroke layers
+ Add Stroke Layer puts another stroke on the same path, drawn over the first. A dashed blue line over a solid red one, a wide pale casing under a narrow dark centerline, a hatched retaining wall over a solid face. All of these are one path with two strokes.
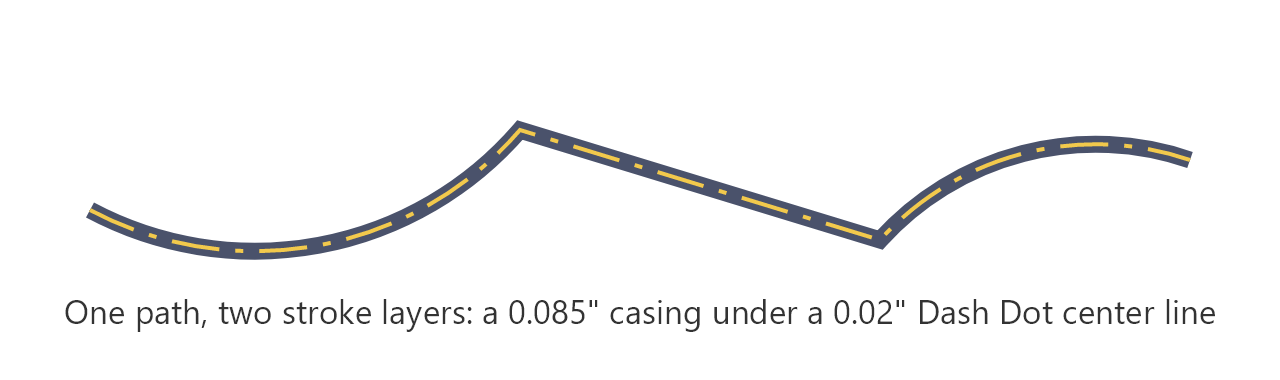
Each stroke layer appears in the scene tree as a child of its object, and selecting it opens its own editor: Visible, thickness, opacity, stroke style, color, and Delete This Stroke Layer. Reorder them in the tree to change which draws on top.
Shadow
Show Shadow (or Show Override Shadow) adds a drop shadow, with Offset X and Offset Y, Blur X and Blur Y, opacity, and a full color control. Shadows on open paths follow the linework rather than assuming a filled area.
These per-style shadows are independent of the look's global sun. Where both apply, the per-style shadow wins, so a building can keep a specific shadow while everything else follows the sun set in Look Settings.
Height above ground, at the top of the tab and in drawing units, is for the look's sun rather than the drop shadow: give a building layer 30 and a fence 6 and a look with shadows on sweeps each outline along the sun by the length its height and the sun altitude give. A tree symbol throws its crown's shadow from its trunk. At 0 a library symbol (a tree, shrub, bench, person or car) stands at a height from its drawn size, and the line under the box says what it is using; type a height to change it, on the layer or on several selected objects at once. Anything else at 0 leaves the look's fixed shadow length in charge. It takes the same per-object override as the rest. An unfilled outline or an open line with a height stands up as a wall. On a Civil 3D surface the height is above the ground under the object, and for a selected object the tab shows what was read there, for example "Stands on Combined FG at 641.2; top at 670.2", or a range for an outline on sloping ground.
Editing Several Objects at Once
Select several objects (Ctrl+Click or Shift+Click in the tree, or a
marquee on the canvas) and the tab shows the properties of one of them. Fill, stroke,
texture and shadow changes made there apply to every selected path, circle, merged path and
symbol. An object that was following its layer takes over only the property you change and
keeps following the layer for everything else.
Override Layer Style switches the override on or off for all of the selected objects together. Objects on locked layers are left as they are.
Layers are edited one at a time. To bring a whole family of layers to one look, finish one of them, then copy it onto the rest with Paint Style, the brush button above the layer tree.
A working order that saves time
- Accept the auto-mapping and remembered-style prompts on import.
- Tag the big surfaces with materials.
- Fix layer colors and lineweights where CAD's are not what you want on paper.
- Pick the look, and only then start fine-tuning.
- Use overrides last, for the handful of objects that need to differ.
- Remember Style on the layers you will see again next project.